DRONEGUARD 100
Operator Manual
System Overview
The DroneGuard 100 is a five-channel RF spectrum monitoring and detection platform designed for real-time detection of UAV control and video downlink signals. Unlike general-purpose spectrum analyzers, the DroneGuard integrates automated scanning, adaptive thresholding, and multi-modal alarms to provide rapid operator awareness in both permissive and contested electromagnetic environments.
Primary Use Cases:
• Tactical perimeter defense (platoon/company level)
• Mobile deployment for reconnaissance/security teams
• Infrastructure and convoy protection
• Integration with EW effectors (jammers, anti-drone guns)
Introduction
The DroneGuard 100 is a lightweight, portable device that detects the presence of drones by scanning common control and video frequencies. It gives you audio, visual, and vibration alerts when a drone is nearby. It has been battle-tested in real operations and is trusted by military and security teams worldwide. At the same time, it is designed with a simple interface so anyone can use it without technical training.
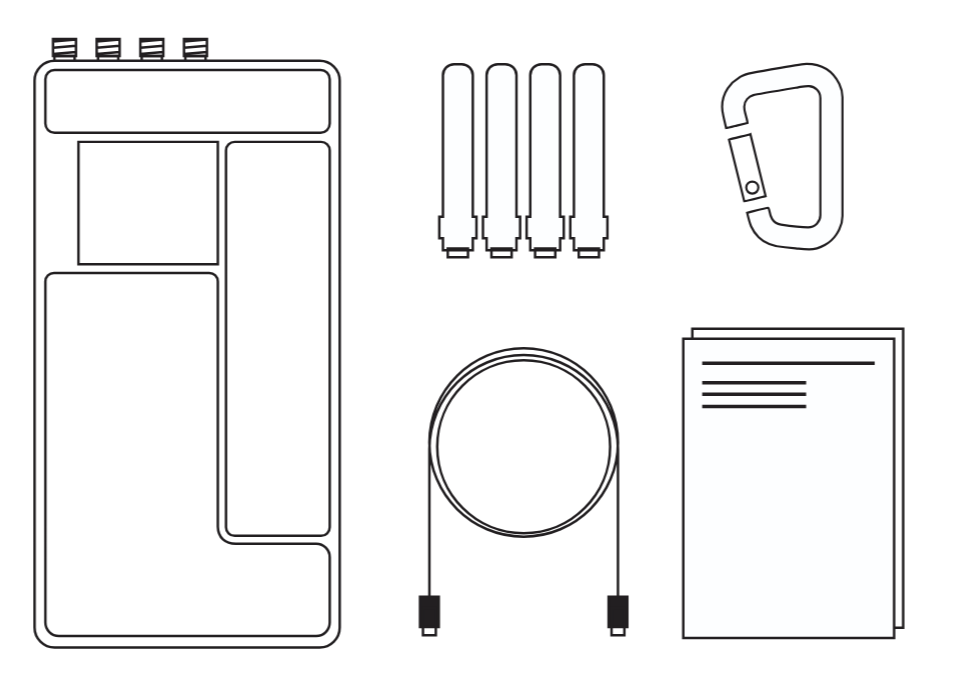
What’s in the Box
• DroneGuard 100 unit
• 4 antennas (for 0.9, 1.2,2.4, and 5.8 GHz frequencies)
• USB-C charging cable
• Carabiner with MOLLE clip (for attaching to gear or backpack)
• Instruction sheet & warranty card
Key Features
• Detects drones up to 1 km away
• Works across five frequency bands: 0.9, 1.2, 2.4, 4.9, and 5.8 GHz
• Alerts via sound, vibration, LED lights, and screen display
• Rugged, all-weather design (IP54 protection)
• Lightweight: 350 g (about the weight of a soda can)
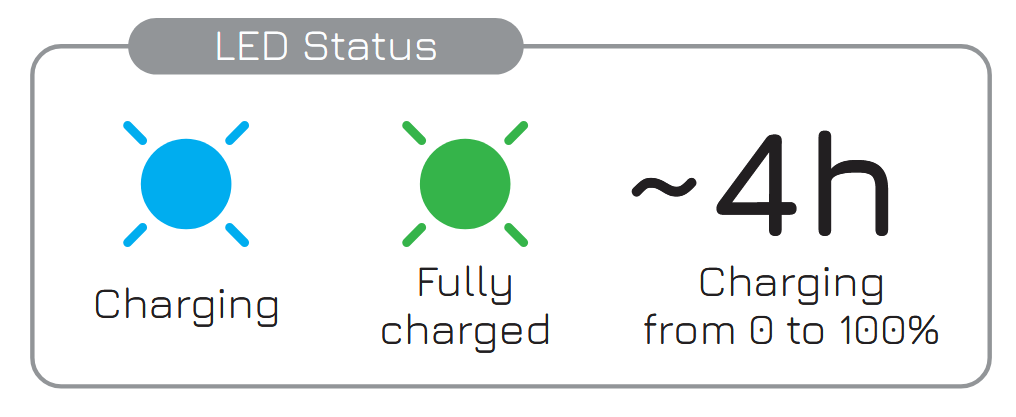
• Battery lasts 6–8 hours and recharges in ~4 hours
• Tested to work from -30°C to +55°C (-22°F to 131°F)
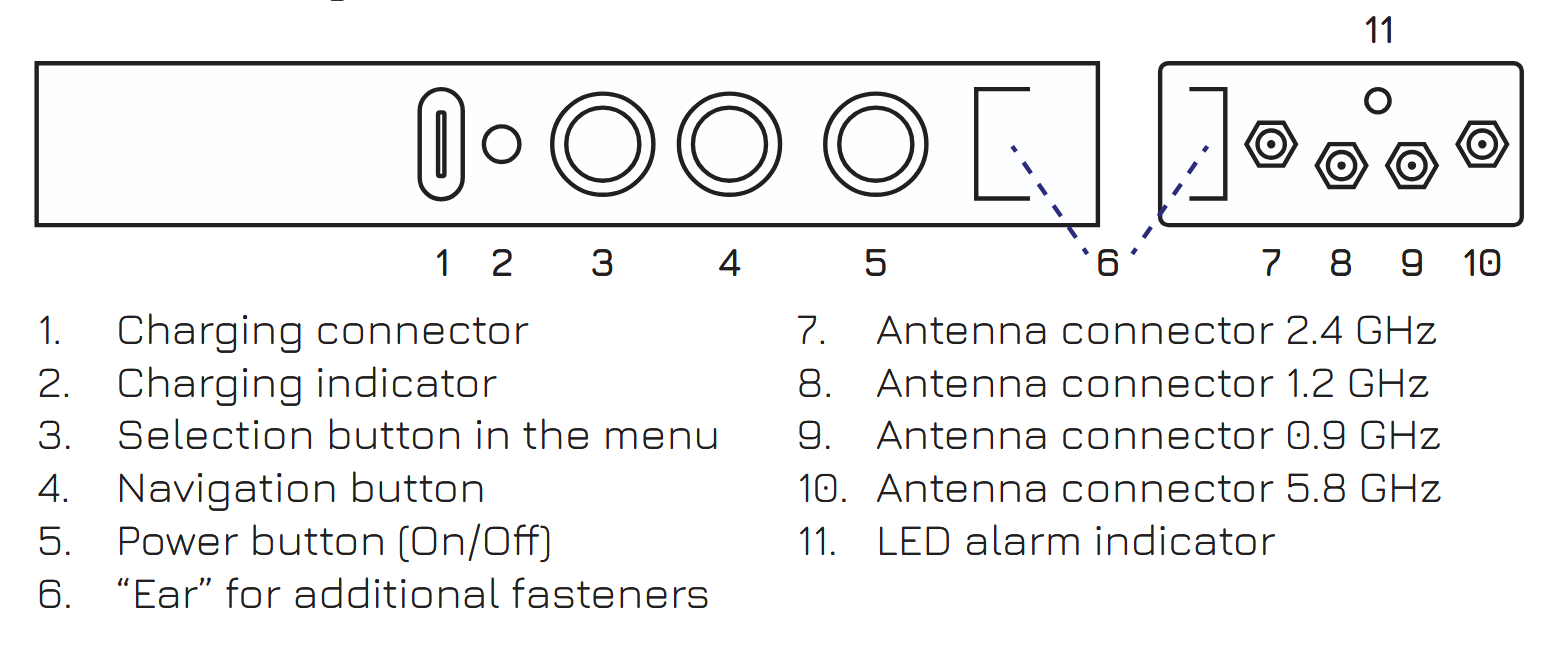
Device Overview
Front and Side Controls:
• Display screen – shows frequency and signal strength
• Navigation buttons – move through menu options
• Power button – turn device on/off
• Charging port (USB-C)
• LED indicators – alarms and charging status
• Antenna connectors (SMA ports) – attach antennas for maximum range
Setup
• Attach the antennas: Screw each antenna into its marked port (0.9,1.2, 2.4, 5.8 GHz).
• Turn on: Press and hold the power button for 3 seconds. Screenlights up in ~5 seconds.
• Check battery: Battery level shows on screen. Charge if below 20%.
• Wear or place device: Clip to belt/vest or keep in a backpack pocket for mobility.
Using the Device
The DroneGuard 100 automatically scans all supported frequencies within 10 seconds.
When a drone signal is detected:
• Screen shows the frequency and signal strength (1–100%).
• Beep pattern: the stronger the signal, the more beeps (e.g., 8 beeps for 80%).
• Vibration and LED alarms trigger if enabled.
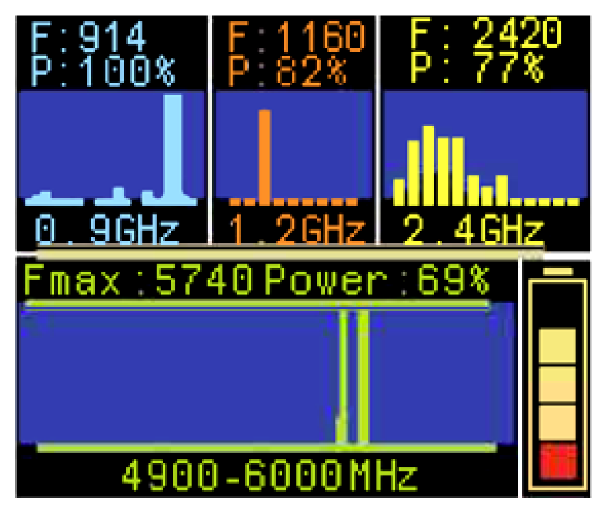
Interpreting signals:
• Stronger % values = drone is closer.
• The 2.4 GHz and 5.8 GHz ranges often overlap with Wi-Fi/Starlink, so occasional false alarms are possible.
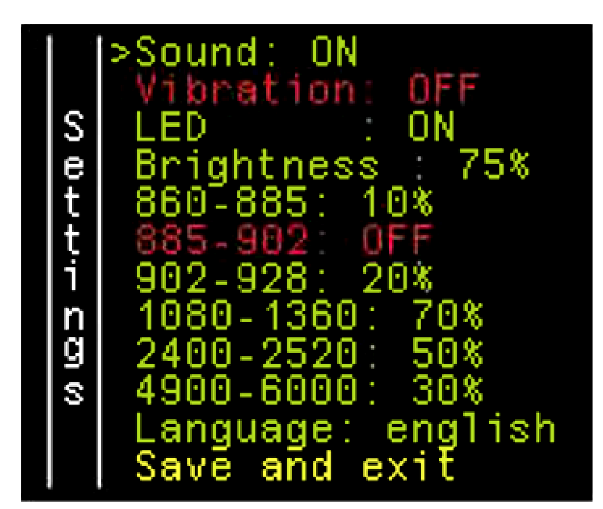
Menu Settings
Access the menu: hold both navigation buttons under the power button until the menu appears.
Options include:
• Sound: ON/OFF
• Vibration: ON/OFF
• LED light: ON/OFF
• Brightness: 0–100% (in 25% steps)
• Alarm sensitivity: Adjust threshold for each frequency band (ignore weak/noisy signals)
• Language: English default
• Save and exit
Charging
• Plug the included USB-C cable into the charging port.
Care & Safety
• Plug the included USB-C cable into the charging port.
Warranty & Service
• Warranty covers replacement during the warranty period if used correctly
• Excludes damage from self-repair, opening the device, water immersion, or misuse
• For service related questions please contact support at support@adleraerospace.com
Quick Specs
• Detection range: up to 1000 m
• Detection height: 500 m
• Battery: 7000 mAh lithium-ion
• Weight: 350 g
• Size: 15.5 × 8 × 4 cm
• Protection: IP54 (dust/splash resistant)
• Channels: 0.9 / 1.2 / 2.4 / 4.9 / 5.8 GHz

RF Architecture
• 0.9 GHz (860–928 MHz) → Zala, Lancet, Orlan-class UAVs
• 1.2 GHz (1080–1360 MHz) → FPV systems, Zala ISR variants
• 2.4 GHz (2400–2520 MHz) → DJI Mavic, Autel, Wi-Fi UAVs
• 4.9 GHz (4990–5200 MHz) → Autel FPV, tactical ISR drones
• 5.8 GHz (5645–5945 MHz) → Mavic FPV, Autel FPV
• Sensitivity: 860–5945 MHz, with adaptive detection thresholds
• Signal detection latency: <10 seconds across all bands
• FHSS detection: Enhanced range capture of frequency-hopping signals
Perfomance
• Detection range: up to 1000 m in open terrain (LOS), ~500 m AGL
• Environmental: All-weather, tested in sub-zero and desert conditions
• Ingress protection: IP54 (dust/splash resistant)
• Immersion tolerance: up to 20 m (spec-sheet stress rating)
Physical
• Dimensions: 155 × 80 × 40 mm (main unit)
• Weight: 345–350 g incl. battery
• Display: TFT, 128 × 160 px
• Connectors: SMA antenna ports × 4
Power
• Battery: 7000 mAh Li-ion, >6 h runtime (field-tested: 8 h at 25°C)
• Recharge: USB-C, 5V/2A (≤4 h full charge)
• Alternate supply: 9.6–34.3 VDC input
Operation Theory
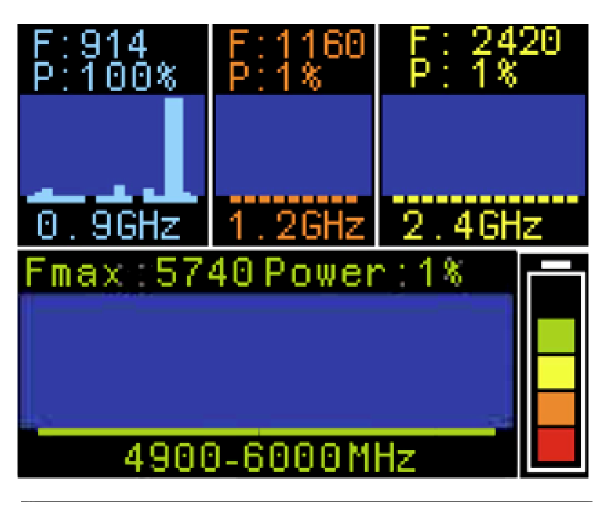
The DroneGuard 100 continuously scans and analyzes five discrete RF bands. Each band is mapped to a real-time spectrogram + power density display, with alarm triggers configurable by the operator.
• Detection principle: RSSI-based capture of UAV uplink/downlink emissions, with optional filtering by minimum power threshold (10–90%).
• Spectrogram resolution: Configurable by column (per MHz increments in 1.2 GHz and 2.4 GHz bands).
• Alarm correlation: Visual (bar graph height), numeric (% signal strength), and auditory (beep count proportional to %).
• Example: A detected FPV uplink at 1258 MHz will appear in column 9 of the 1.2 GHz window; power at 84% = 8 consecutive beeps.
Advanced Configuration
Menu System
Access: Hold both navigation buttons.
Configurable parameters:
• Sound/vibration/LED: Independent ON/OFF toggles
• Brightness: 0–100% (25% steps)
• Band-specific thresholds: Adjustable 10–90% (rejects noise below set power)
• Language: English default, localized firmware available
• Save & Exit: Applies new operational profile
Sensitivity Tuning
Operators can tune per-band alarm thresholds to avoid false alarms in cluttered EM environments (urban Wi-Fi/Starlink, EW interference).
Recommended values:
• 0.9 GHz: ≥70% to reject LTE interference
• 1.2 GHz: ≥50% (video link signals strong and distinct)
• 2.4 GHz: ≥60% in urban areas (to filter Wi-Fi)
• 5.8 GHz: ≥30% baseline, higher if Starlink present
Integration with EW & Tactical Systems
• EW compatibility: Device will alarm falsely if within <10 m of high-power EW/jamming transmitters. Best practice: position ≥15 m offset from EW sources.
• Anti-drone guns: DroneGuard 100 can serve as early-warning for manual deployment of effector systems.
Field Deployment Notes
• Urban use: Limited by high ambient Wi-Fi/Starlink emissions; directional antennas recommended.
• Armored vehicles: Attenuates detection range significantly; external antenna mounts strongly advised.
• Environmental: Tested operational reliability from −30°C to +55°C; storage −40°C to +85°C.
Maintenance & Service
• Battery replacement: Not user-serviceable; authorized service only.
• Firmware upgrades: Via USB port; official certified service centers only.
• Warranty void if tamper seals broken, water ingress, or unauthorized modifications detected.
Troubleshooting (Expert Level)
| Symptom | Likely Technical Cause | Expert Action |
| Persistent alarms on 2.4/5.8 Ghz | Wi-Fi/Starlink interference | Raise band threshold to >70% or deploy band-specific filters |
| No detection in LOS field test | Antennas not matched or defective | Swap band-specific antenna, check SMA integrity |
| Device false triggers near EW | Saturation of front-end receiver | Increase separation distance or use external attenuator |
| Spectrogram shows signals nut no alarms | Threshhold misconfigured | Recalibrate thresholds per operational SOP |
Field Deployment Notes
The DroneGuard 100 is not merely a “detector” but a dedicated, portable, adaptive RF monitoring node. It combines ruggedized hardware, configurable RF processing, and battle-proven detection algorithms, making it suitable for professional defense and EW integration in tactical scenarios.
