MANUAL DRONE GUARD 500
DRONE DETECTION SYSTEM DDSR1 V3
DRONE DETECTION SYSTEM R1 (DDSR1 V3)
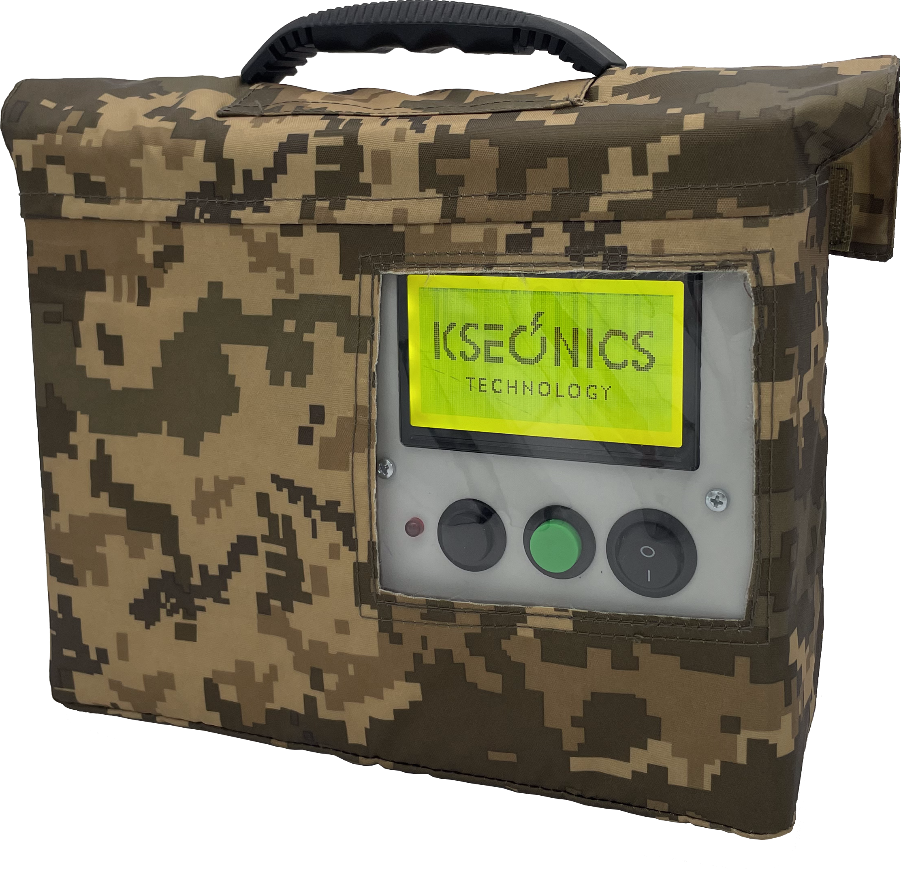
is a portable device that can be installed stationarily, which works as a scanning system with notification, operating in the frequency bands of 0.9 GHz, 1.2 GHz 2.4 GHz and 4.9-6.0 GHz. It allows the detection of quadcopters, FPV drones, unmanned aerial vehicles, active EW systems, control panels. The advantages of this system are: proprietary software, understandable graphical interface, effective detection distance and height, relatively small size, sealed housing with IP65 protection, built-in directional antenna of own production with a high gain factor, built-in power source (autonomy up to 16 hours). With the help of the DDSR1 detector, it is possible to detect enemy drones in a timely manner, which allows to increase the time of decision-making by soldiers (civilians) and take appropriate security measures. The DDSR1 drone detection system is used to detect radio signals in the airspace within stationary objects (fortifications, riots, etc.), parking places of vehicles and armored fighting vehicles, artillery positions.
Detects the presence of drones during the day and at night in any weather conditions. The device automatically scans in the 0.9 GHz, 1.2 GHz, 2.4 GHz and 4.9–6.0 GHz bands in less than 10 seconds and detects the presence of a signal in real time, notifying it on the display, using light, vibration, sound (if necessary, personal headphones or a speaker system).
The device automatically scans in the 0.9 GHz, 1.2 GHz, 2.4 GHz and 4.9–6.0 GHz bands in less than 10 seconds and detects the presence of a signal in real time, notifying it on the display, using light, vibration, sound (if necessary, personal headphones or a speaker system). An important advantage of the detector is its use in conjunction with an EW system or an anti-drone gun. The device signals the appearance of a UAV and helps to determine the direction relative to the antenna's directional diagram, which increases the efficiency of REB systems and their time of use. Compared with portable spectrum analyzers, which are used to detect radio signals emitted by UAVs, the device is aimed at all users without exception, the interface is designed to be intuitive and easy to use. The detector has a greater detection and capture distance of PPP signals, which allows to shorten the time of detecting the signal emitted by the object in the air and notify the user in a timely manner. Structurally, the detector was developed specifically for use in the field and tested on the range in conditions as close as possible to combat. It is possible to deploy several detectors to optimally detect the direction of the UAV (signal triangulation method). The detector has the ability to work effectively in conjunction with the EW system, which significantly increases the level of protection against unmanned aerial vehicles.
DDSR1 quickly detects the presence of drones using directional antennas. The REB system takes information from the detector and for the most powerful detected frequency turns on the obstacle. Thanks to this integration, the detector not only detects the threat, but can also provide a quick automatic response to it, making the protection more effective and reliable. This interaction of the detector with the REB system allows you to create a comprehensive solution for detecting and counteracting unmanned aerial vehicles, which significantly increases the level of protection. The detector has the ability to increase the battery life from the Powerbank via the USB Type-C connector, which ensures maximum mobility and convenience of use in various conditions, allowing you to use it wherever access to stationary power is limited or impossible. Thanks to the 3.5 mm audio jack, you can choose any convenient notification device - both personal headphones (for silent signaling) and more powerful speaker systems (for collective warning or use on large objects), which allow you to immediately receive an audio notification about the detection of a drone. This allows you to respond to threats in real time without having to constantly watch the system screen.
SET Drone detection device (DDSR1 V3); User manual (warranty card); AC / DC 16.8V / 2A mains charger; Additional accessories (cover, tripod).
CHARACTERISTICS The detector begins to detect signals in real conditions in the bands of 0.9 GHz, 1.2 GHz, 2.4 GHz, 4.9-6.0 GHz at a distance of: 1200-2000 m (depending on the transmitter power). Strong, stable signal detection: up to 500 m. Detection height (tested): up to 500 m. Frequency response: 0.9 GHz (860-928 MHz), 1.2 GHz (1080-1360 MHz), 2.4 GHz (2400-2520 MHz), 4.9-6.0 GHz (4900-6000 MHz).
The device does not scan non-standard FPV control frequencies, only remotes emit, the drone does not emit them! Unmanned boats with machine vision, which are controlled by fiber optic cable, also do not emit any signals! Notification methods: sound, vibration, LED indication, notification on the display, alarm in the headphones (or speaker system). Housing protection: IP 65. Display: LCD 128x64. Battery capacity: Li-Ion 20,000 mAh. Autonomy of the device: up to 16 hours (depending on the mode and operating conditions). Charging time: up to 3 hours (AC / DC 16.8V / 2A).
DIMENSIONS
Length: 225 mm;Width: 175 mm;
Height: 80 mm;
Weight: 1450 g.
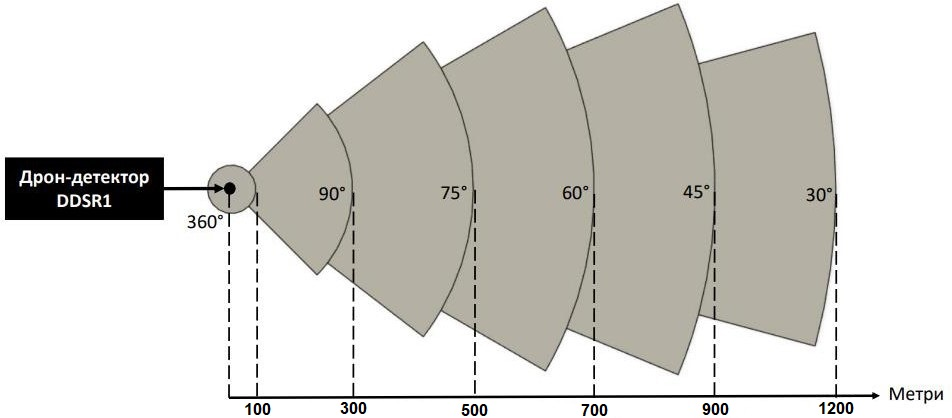
DEVICE DIRECTIONALITY DIAGRAM

UAV DETECTION CHARACTERISTICS
DDSR1 V3 DEVICE IDENTIFICATION
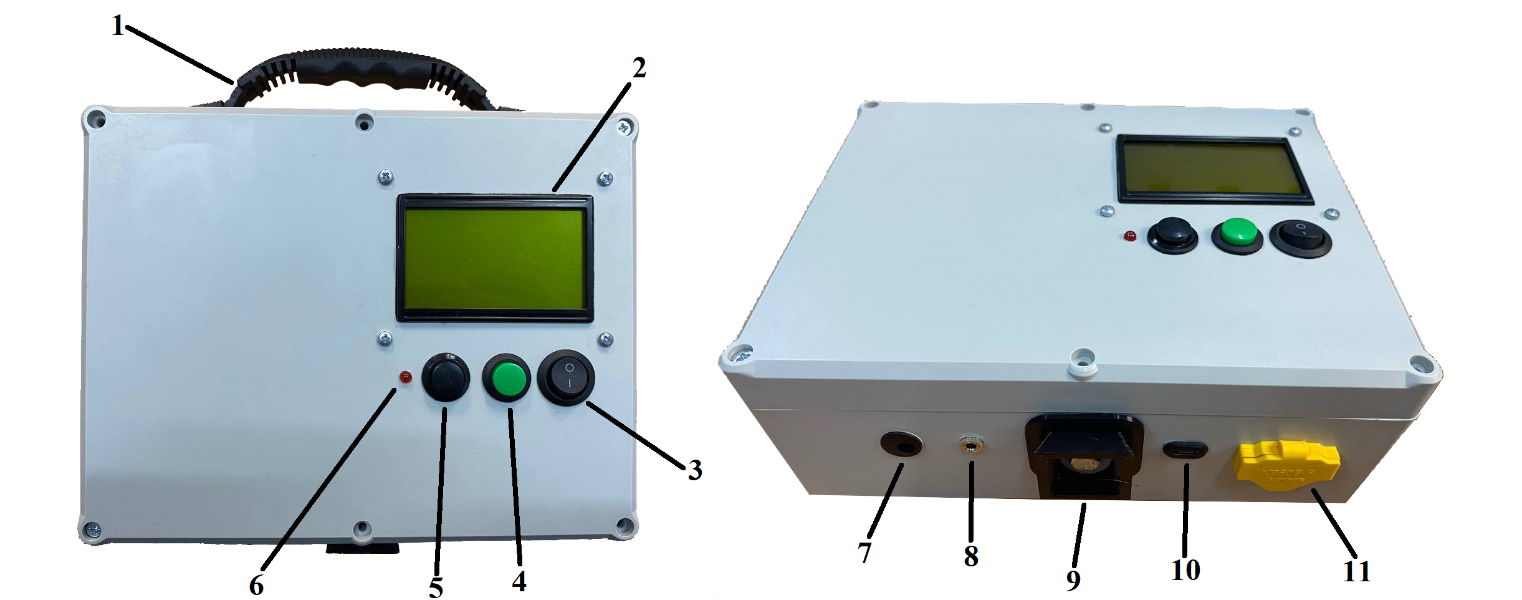
1. Carrying handle;
2. Device display;
3. Power button;
4. Menu selection button;
5. Navigation button;
6. LED indication;
7. Charging input;
8. 3.5mm audio jack;
9. Tripod mount;
10. USB Type-C socket for power supply from a power bank;
11. XT60E-F connector ("dry contact" relay output) for connecting REB 20A/14VDC devices (optional).
PREPARATION FOR USE
Unfold the tripod, mount the device on it. The detector should be placed on the tripod with the display facing the operator and directed in the direction of the probable movement of enemy drones. At the same time, the detector should be set at an angle to the ground surface (the optimal angle of the device to the horizon is 45 degrees).TURNING THE DEVICE ON AND OFF
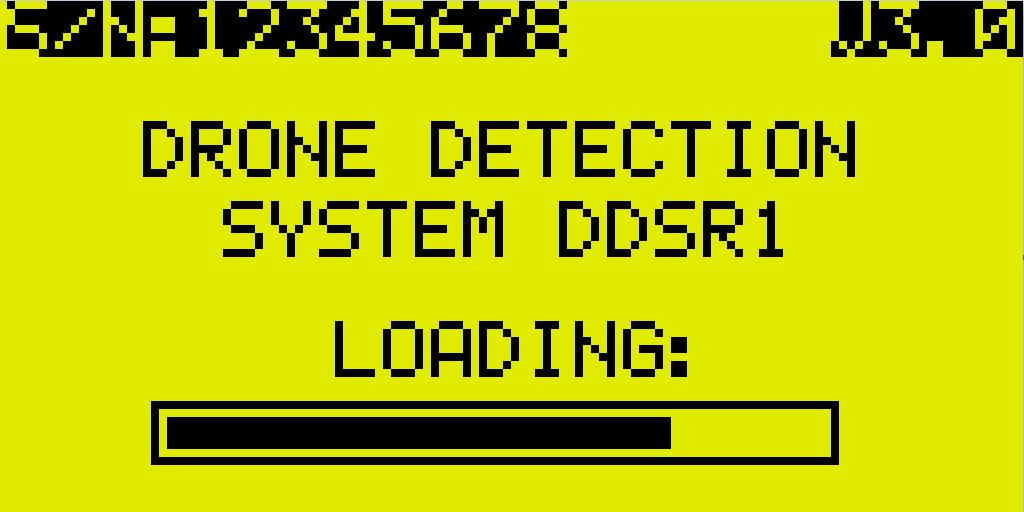
Turning on - slide the power button to the lower position, the display will light up, the device will start.Turning off - slide the power button to the upper position, the device will turn off, the display will go out.
SETTINGS MENU
1. To enter the menu, hold down the black and green buttons. When the menu loads - release both buttons at the same time.2. To switch menu items, use the black navigation button (move down in the menu), and to change settings, use the green button.
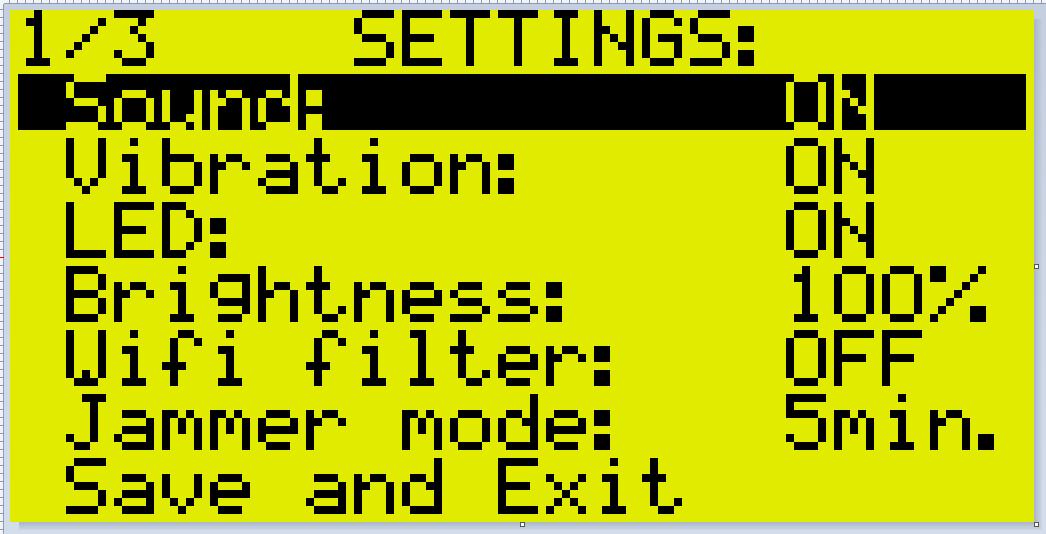
Settings
3. "Sound" - sound alarm on/off;4. "Vibration" - vibration alarm On/Off;
5. "LED diode" - LED alarm On/Off;
6. "Brightness" - brightness adjustment from 0% to 100% with a switching step of 25%.
7. "Wifi Filter" - On/Off. This function is designed to filter out signals transmitted via Wifi networks that are not related to drone activity. It allows you to focus only on potential threats from drones, filtering Wi-Fi background signals, and thus reduces the number of false alarms. In or near towns, you can turn on the Wi-Fi filter so that the device does not respond to Wi-Fi router pulse signals. With a large number of routers or with a large Wi-Fi data transmission stream (downloading, watching video), the device may react to detection. However, the filter turned on reduces the detection range of real potential threats. 8. "REB Mode" - turning on the device compatible with the REB system "30 s / 1 min. / 2 min. / 5 min. / Off".
9. "Save and Exit" - saving settings with exiting the menu and going to the operating mode.
REB Mode
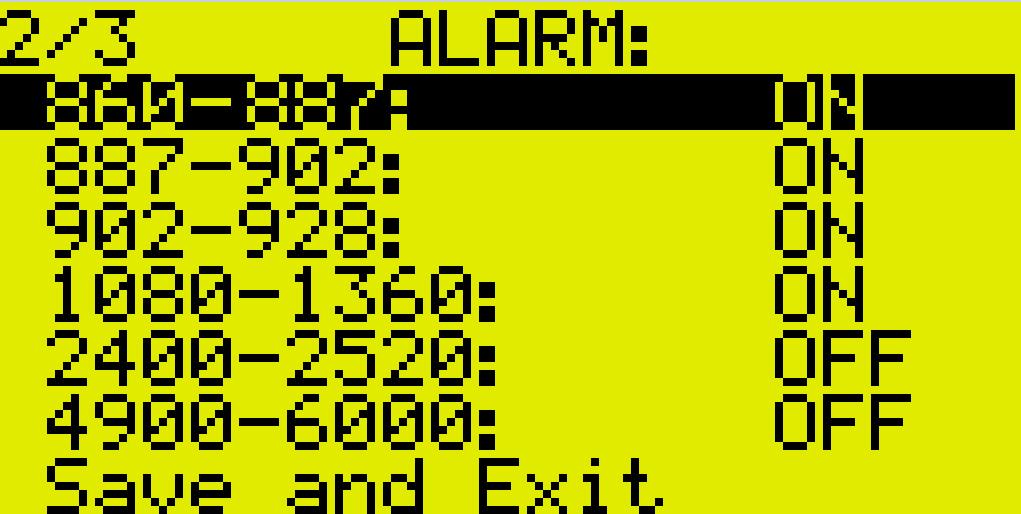
Before starting work in REB mode, several settings must be made:1. In the "2/3 Alarm:" menu, the alarm should be enabled for one or more required frequency ranges.
2. In the "3/3 Alarm Level:" menu, set the power level of the minimum alarm activation and, accordingly, when the detected signal exceeds the set power threshold, EW will be activated.
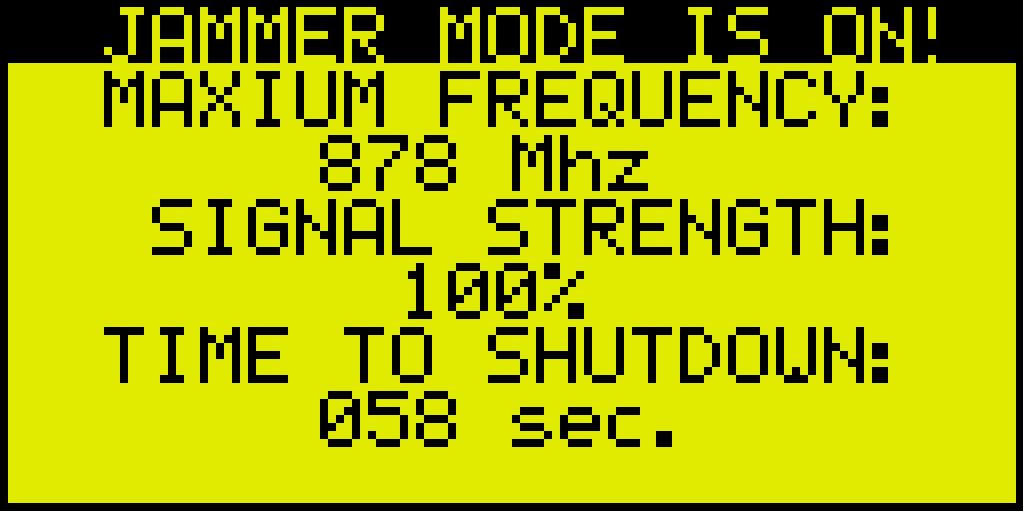
3. In the "1/3 REB Mode" menu, select the time during which the REB system will activate the obstacle (30 s / 1 min / 2 min / 5 min). Immediately after the REB mode is turned on (for example, 1 min. is selected), the device scans all operating frequency ranges, and if the strongest signal in range is detected (exceeding the selected alarm levels for these frequencies), it uses a relay to turn on the obstacle in the REB system for 1 minute in the range where the threat was detected. Then the relay turns off the REB and the scanning process takes place again until a signal exceeding the alarm level is detected. If the alarm (notification alarm) is turned off for a specific frequency range, the REB system turn-on process for this frequency range will not work.
Alarm
10. "Alarm 860-887, 887-902, 902-928, 1080-1360, 2400-2520 and 4900-6000" - if necessary, you can fully "enable/disable" the signaling of the selected frequency range.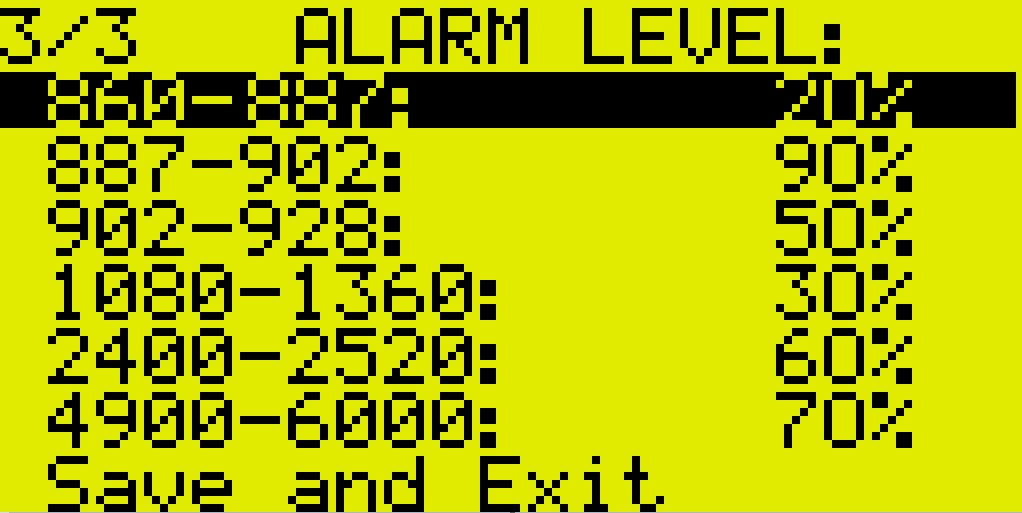
Alarm Level
11. "Alarm Level 860-887, 887-902, 902-928, 1080-1360, 2400-2520 and 4900-6000" - if necessary, you can set the alarm power level separately for each frequency range from 10% to 90% in 10% steps. All signals below the installed power level will not be signaled.
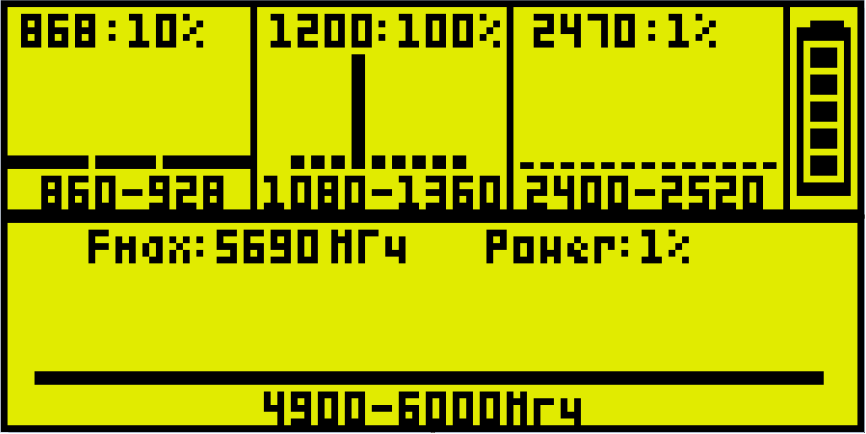
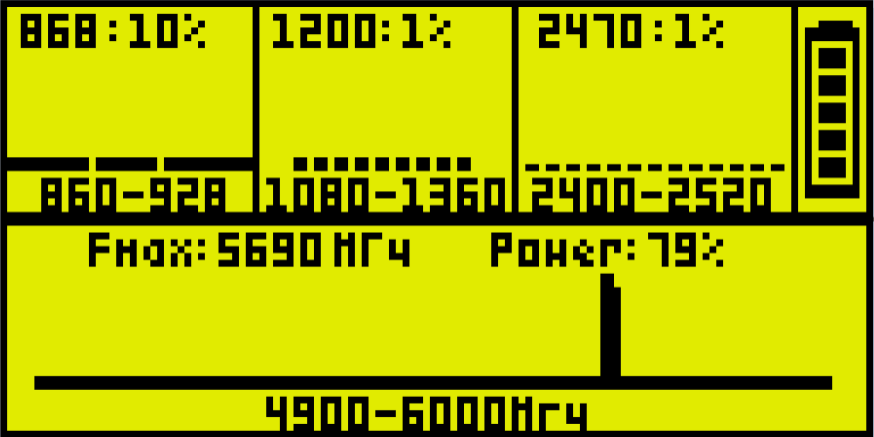
DRONE DETECTION
When a drone appears in the device's capture area, columns and/or a spectrogram will appear in one or more display windows. Depending on the detected frequencies, the appropriate alarm will be triggered (configured in the menu). For convenience and clarity, the frequency and strength of the detected signals are indicated at the top of each display window, for example "XXX: YY%" will mean that the device "caught" a signal on the XXX MHz frequency with a YY% power. The closer the drone is, the higher the power level the device will show. The signal strength is also reflected in the height of the bars and their number. The signal strength for each frequency range can be displayed in the range from 1% (the weakest signal or no signal at all) to 100% (the strongest signal). Depending on the signal strength, after switching on the sound alarm, the sound frequency changes during the alarm: at the maximum height of the column, the tone frequency delay will be maximum, at a small height of the column - minimum.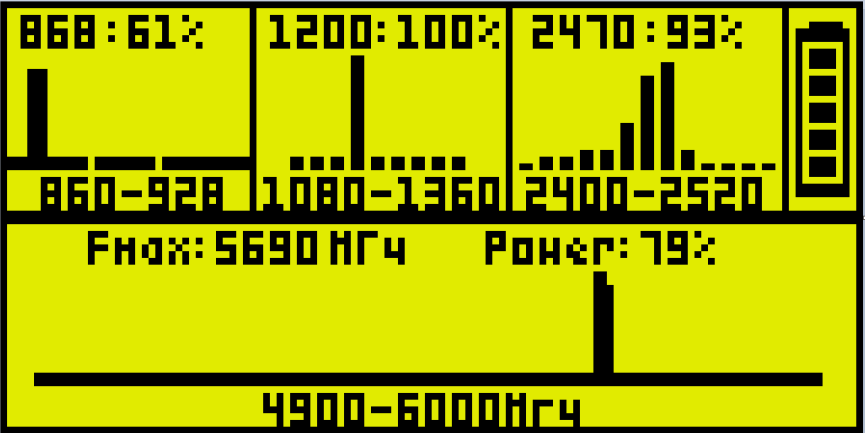
The display of signal detection in the 860-928 MHz band is done in the form of a spectrogram. If the device does not detect any signal in this range - the scale will be empty. This means that the scale shows the strength of the RSSI input signal: the higher the scale, the stronger the signal level. In the medium frequency range of 860-928, cellular communication signaling is possible. Therefore, the alarm for this range can be disabled in the menu.
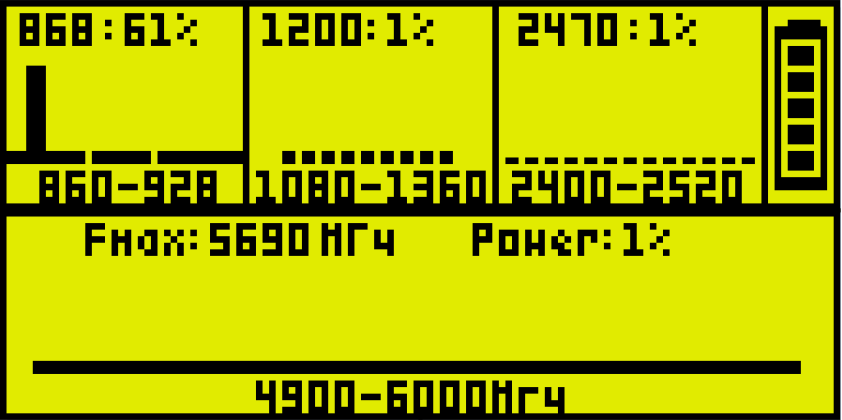
If the signal is present in any of the above-described ranges, the display will show columns with heights depending on the strength of the detected signal and an audible, LED or vibration alarm will be triggered. When there is no signal - there will be no message, sound, vibration and LED indication (small sounds are possible). 2. At 1.2 GHz, the detector detects unmanned aerial states by tracking their video signals. The device scans the 1.2 GHz frequency range, which drones often use to transmit video. If a signal similar to the drone's video signal is detected, the detector records it and notifies on the display. Then the detector continues to track the signals to track the threat in real time. Generally, the system quickly detects drones and notifies the threat, allowing users to react quickly. *For 1.2 GHz frequency bands, the division step is given in the corresponding table, please note that the 1258 MHz frequency is in column 9. The height of the column depends on the strength of the detected signal.
3. When no signals are detected on the 2.4 GHz frequency, the corresponding window will remain empty. If the drone signal is present in this range, an alarm signal (configured in the menu) will be triggered and this information will be displayed on the display, similarly to the detection of the 1.2 GHz band.
4. Detection of signals in the 4.9–6.0 GHz frequency band is similar to detection in the 0.9 GHz band. The higher the column and the value in %, the stronger the signal is detected by the detector.
DEVICE CHARGING INDICATION AND PROCESS
1. Charge indication:• The indicator shows the battery charge level from 0-100%, with a division step of 20%;
• When the charge level is low, the device should be charged.

2. Charging the device:
• Using the included network card (16.8V/2A), connect the device to the charging input;
• The charger LED will light up red (charging is in progress). When the detector is fully charged, the LED will change to green. To check if the device has charged, disconnect it and turn it on, the result will be displayed on the display.
IMPORTANT SAFETY NOTES
• Do not lean on the device's stand.• Do not disassemble the device - there are no user-serviceable parts inside.
• We recommend using the same network card that comes with the device.
• If the housing is dirty, wipe it with a soft, dry cloth.
• As a precaution, disconnect the charging cable from the mains and turn the device off before cleaning.
• Do not immerse the device in water or other liquids.
• The ambient temperature for using the device is from -20 to +55 °C.
• The brightness of the display may be uneven depending on the temperature or humidity. This is not a malfunction.
OPERATING RULES
• Place this device on a flat place.• Effective use in a populated area of cities is impossible because there are many Wi-Fi/Starlink signal sources that will interfere with the work, and buildings that obstruct the passage of the drone signal. Use in dense buildings in the absence of Wi-Fi/Starlink sources is possible but complicated. In addition, using the device in armored vehicles reduces the effective work and detection range of signals.
• Wi-Fi/Bluetooth/Starlink may cause false alarms. It is especially disturbing to Wi-Fi/Starlink work in the 2.4 GHz and 4.9-6.0 GHz range. The settings are set to operate in the most typical cases with consistently strong signals. The device does not guarantee operation in 100% of threat cases, false activation to extraneous sounds is also possible - this is not a fault.
• The presence of the REB system in the vicinity will trigger false alarms. In order to prevent the sensor from failing, it is recommended to use it at a distance greater than 10 m from the EW system.
• The device DOES NOT DETECT frequencies that are not specified (are not functional).
SERVICE CENTER
Dear user! If you need warranty service for your equipment, please contact the service center: Phone, Viber, Telegram, WhatsApp: +48 571 274 829.When contacting the service center, you must clearly state the problem and provide information about the terms of use of the device.
When sending the device to the service center by mail, it must be packed in the factory packaging to prevent damage during transport.
TERMS OF WARRANTY SERVICE
1. Warranty service includes free repair or replacement of components or equipment during the warranty period.2. Warranty repairs are performed by an authorized service center.
3. The decision on the advisability of repairing or replacing defective parts of the equipment is made by the service center.
4. The warranty does not cover equipment:
- with missing or damaged warranty labels, stickers, seals, tight seals;
- has traces of mechanical damage or self-repair;
- with traces of accidental or intentional entry of foreign bodies, substances, liquids;
- is used in violation of the operating rules or is used in a manner inconsistent with its intended use;
5. The warranty period for the device is 12 months from the date of purchase.
